It’s been a while since I wrote about my optical bay HDD caddy experiment, but the results are finally in. I’ve been running my laptop for over a month now with a Kingston V100 SSDnow in the primary storage bay and the original hard drive in a NewmodeUS optical bay caddy, and have been quite pleased with the results. My computer boots up quickly, applications launch instantly, and there’s plenty of space to store big files for when I need them. There are a few downsides though, which I’ll go into more detail about shortly. Is it worth your while to make this upgrade? Read on to find out!
The theory behind an optical bay hard drive caddy is simple: put a high-capacity hard drive in the rarely-used optical bay, freeing up your primary storage bay for a smaller, faster SSD. Solid state drives are faster, often more power efficient, and more durable – but they are also much more expensive per unit storage than hard drives.
Contents:
- Pre-configuration steps
- The installation process
- Configuring your new setup
- Using your old optical drive
- Final review
Pre-Configuration steps
My next post will focus on detailed methods for optimizing your software configuration. If you want to reimage your existing OS installation to the SSD, and configure which files are stored on which drive, stay tuned. It’s easiest if you just reinstall your operating system on the SSD – reimaging to a smaller drive is a tedious process. You should definitely make a full backup of your computer before making any hardware changes though. You can read about different backup options on Super User for Mac and Windows.
The installation process
Installing the SSD
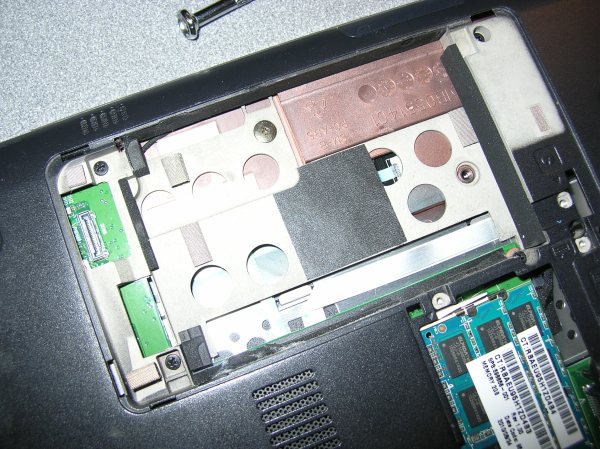
Removing the existing HDD and installing the SSD was the easiest part of this process. The hard drive bay in most laptops is very easy to access. I simply opened it up, unplugged the SATA cable from the existing HDD, slid it out, and put the SSD in its place.
After this is done, boot up and install your OS to make sure everything is working, before you even get to the optical bay portion.
Replacing the optical bay
The process for replacing your optical bay may be a bit more difficult than replacing the hard drive, but should still be doable with standard PC maintenance tools. Make sure to print out the relevant sections of your computer’s service manual ahead of time, or have another computer on hand to refer to.
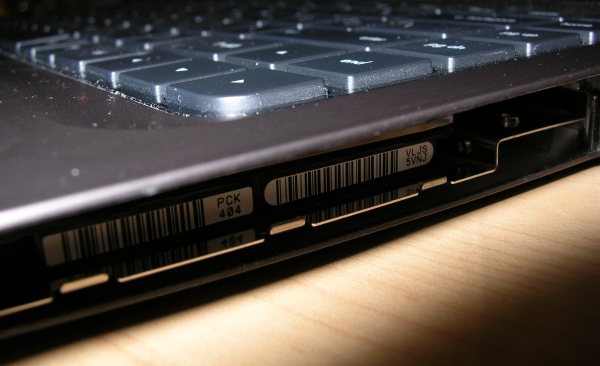
On my HP dm4t, removing the optical drive was pretty simple – I just had to open the maintenance hatch, remove one screw, and slide it out. If your drive is slot loaded, this may be a bit trickier.
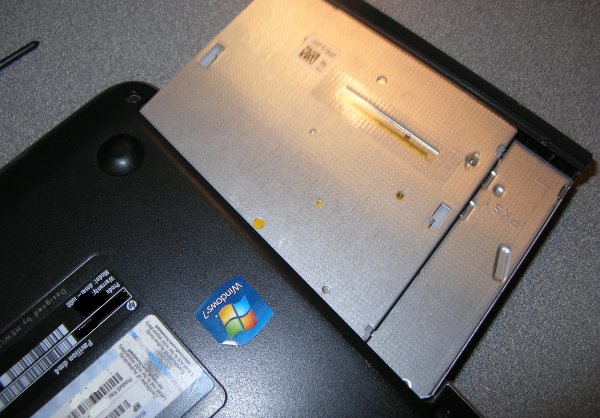
The optical drive should just slide right out smoothly. Don’t force it too hard. Once it’s out, set it aside somewhere safe. Next, install your old hard drive into the optical bay HDD caddy. It should slide in easily, and then be secured with four screws on the bottom of the caddy. Make sure the connection between the HDD and the SATA connector is secure.
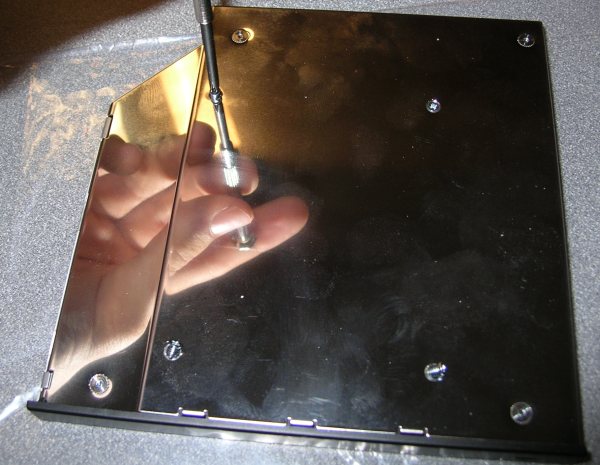
In theory, installing the hard drive caddy should be just as easy as removing the optical drive was, but in my case, this wasn’t so. The optical bay slot in the dm4 is slightly tighter than standard, and the caddy was just a hair too thick to slide in all the way.
After consulting with NewmodeUS’s support, I was informed that the metal piece on the top of the caddy could be safely removed if the drive was a tight fit. Removing the metal cover requires very small screwdrivers, so be prepared. Note that in most cases, this should not be necessary.
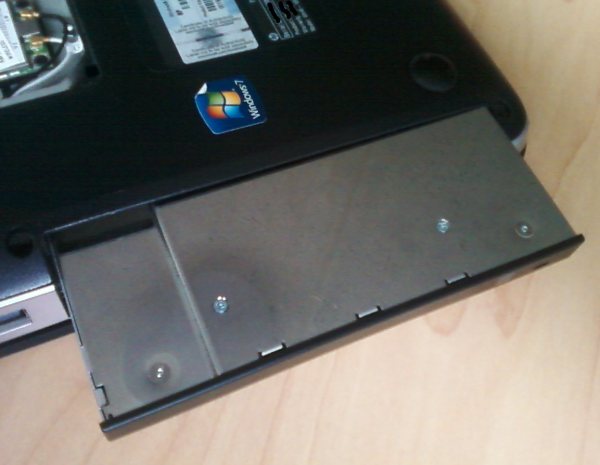
Unfortunately, 9.5mm optical drives do not have a standard faceplate interface, so unless you can find a drive caddy designed specifically for your laptop, you will not be able to affix the original faceplate to the caddy. There is a workaround to this, which I will explain below. If this applies to your laptop, remove the faceplate that comes with the caddy, and insert it into the laptop.
Once I had removed the cover, the caddy slid in without any further trouble. Be gentle when coupling the SATA connector on the caddy with the motherboard – this part is a bit fragile. Once the drive is fully connected, make sure to tighten any screws that hold it in, then close things up.
If the faceplate on your original optical drive is removable, you can take it off and try to affix it to your laptop – I was able to do this using some black electrical tape and some clear scotch tape. It looks surprisingly discreet, and certainly is better than having a gaping hole in the side of your laptop.
Once this is all done, boot up your computer to configure your new dual hard drive setup.
Configuring your new setup
Now that your operating system is installed on your SSD, you don’t need all of those folders on your hard drive. You’ll probably want to copy over your user profile and application settings. In Windows, once you have created an account on your new installation, copy everything from the old drive in usersusernameappdata to %appdata% (usually C:usersusernameappdata). If you’d rather start fresh, you can look for application folders just for certain programs, which I will cover in more detail in the next post.
To free up some space on your storage drive, you may want to go ahead and delete all of the operating system files you don’t need. In Windows, this would be pretty much any folder in the root drive except for users, unless you have created separate data storage folders in the root drive. Again, make sure you have everything backed up to an external drive before you start deleting.
Configuring user folders
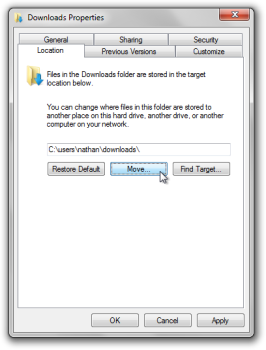
Once you have removed unnecessary folders, you have a bit more freedom with how to set up your drive. I would recommend setting up a folder for each user in the root of the drive, then having their documents, music, pictures, videos, downloads, and saved games folders in that drive. My next post will have details on how to configure these paths in the registry so that even new users will automatically have their profiles set up there. To move your current folders, just click your username on the start menu, then right-click on any special folders you want to move, and choose properties. Select the location tab, then choose “move”. Enter the location on your hard drive, and it should merge the folders. You can also make use of Windows 7’s libraries to set up save locations on both your SSD and HDD.
Hard drive accelerometer software
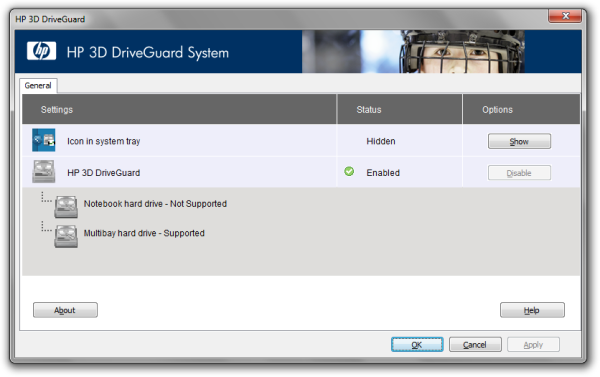
Many laptops now include hard drive fall protection by embedding an accelerometer in the laptop. When the accelerometer detects the laptop falling, it parks the hard drive heads to prevent them from damaging the platter. My laptop comes with HP 3D DriveGuard, and I couldn’t find any information about whether it would work with an optical bay caddy. After installing the caddy, I checked in the 3D DriveGuard control panel and it had successfully detected the SSD and turned off protection for that device, and had also detected the hard drive in the caddy as a “multibay hard drive” and enabled protection for it. Different manufacturers’ hard drive protection may or may not work with an optical bay caddy though.
Extending the life of your SSD
To keep your shiny new SSD performing its best for years to come, read Tom Wij’s tips on how to improve your SSD’s longevity.
Using your old optical drive

NewmodeUS and other manufacturers also sell optical drive connector SATA to USB and eSATA combo adapters. This allows you to use your optical drive outside of your laptop after you’ve replaced it with a caddy. NewmodeUS sent me an optical drive SATA to eSATAp cable, which includes a handy carrying case for your optical drive. Although it is very easy to use, it’s definitely not something you’ll want to carry with you everywhere – I’ve only used it a couple of times since I got it, to copy files from old CDs onto my hard drive. With all of the extra space you have now with two drives, there’s very little need for optical media. You can install Windows from a USB drive, and most software can be downloaded when purchased. Depending on your needs, you may be able to get away without an adapter at all.
There are two types of connectors for external adapters – USB and eSATA combo. Every laptop will have a USB port, but the speeds are limited, and can result in very slow playback and data transfer times. eSATA combo ports have an eSATA adapter and USB adapter combined. USB provides the power, while eSATA can transfer data at much higher speeds.
Review
After using the SSD/optical bay HDD combo for several months now, I’ve gotten a feel for the pros and cons. To be honest, I rarely ever notice or even have to think about it – everything just works. The SSD – which Kronos reviewed in detail – makes boot-up times, application launches, games, and other daily activities much faster, and there is always plenty of space for any files I need to store.
The biggest downside has been the decrease in battery life. This is partially due to this specific SSD: the v100 series is known to be less power efficient than even some standard hard drives, and users have reported losing an hour of battery life or more when installing these drives. With proper power configuration, the secondary hard drive should spin down when not in use, and while this will require more power than a standard installation, one would not expect such a drastic drop in battery lifetime. I used to get around 6.5-7 hours on a charge with the extended battery; now I get about 5.
Although the initial installation was a bit difficult due to the tight optical bay slot in the dm4, everything else in the process worked as planned and was easy to implement. I’ve been really enjoying having increased speeds and plenty of storage, and would highly recommend an optical bay hard drive caddy for anybody who needs speed but requires plenty of space.


